
Let’s Build an AI Agent in 8 Simple Steps
Learn how to build an AI agent in 8 simple steps, from understanding AI fundamentals to implementing tools, decision-making, and task automation.
Over the past few years, we’ve come to use and appreciate chatbots like Gemini, Claude, and ChatGPT in our everyday lives. But as developers, we can go one step further and use the same technology behind these chatbots to create our very own AI Agents.
With chatbots, you ask, they respond. But with Agents, they don’t just respond to commands. They carry out actions for you. Think about tasks that can be automated: helpdesk agents, customer care, and even email agents, which is what we would be building in this article.
If you know the basics of any programming language and understand how APIs work, this article would provide an insight into how agents are built and the core fundamentals behind any agent you might have come across.
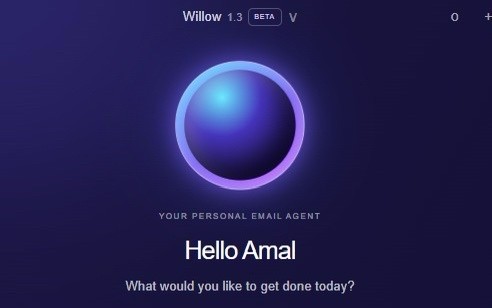
Meet Willow. The email AI Agent that we will be building. The complete code to all the snippets in this article can be found on this github repository: willow

1. The project.
For this project, we will use Next.js in order to create a basic full-stack project that allows for scaling. To do that, ensure you have Node.js installed on your PC and run the command below in a terminal.

Once this is done, you can fire up your project in an IDE like VS Code. And npm install the anthropic sdk as done below:

2. The brain.
In order to successfully create an Agent, we need a Large Language Model (LLM) to serve as the brain of the agent. True, it is possible to choose a self-hosted model, but like a lot of other tools we outsource as programmers, we will be using an already existing LLM. There are a couple of options to choose from, such as Gemini, DeepSeek, or OpenAI’s models, but for this project, we will be using a Claude model through the Anthropic API.
If the concept of an API is new to you, think of it like a bridge connecting your app to another. Imagine building a food recipe app. You have two options: one, build your own database storing recipes by yourself, or two, connect to and use from an already existing database of recipes. Either option is fine, but if there’s a database out there with more recipes than I have, I will fetch from their database instead. And how do I do that? I make a request to their database using their publicly provided endpoint. For example:

That is what we’re doing here with the LLM. Since we don’t have our own, we’re going to be connecting our app to Claude using the Anthropic API. We’re using Claude because it’s one of the strongest LLMs in the world today, and a model that gives you an edge once you understand it. You can transfer knowledge of building with the Claude API into building with any other LLM.
In order to use Claude, head over to the Claude Console and create an account. You would need credits, which you can purchase for as little as $5. These credits burn per million tokens, so this is plenty to learn with.
Then you would need to get your API key. Generate your API key and paste this in your environment variable in the project created above. This file (.env) should be included in your gitignore. This key is secret and should not be pushed to your GitHub.


3. Making an interface.
While we focus on building with the Claude API, we will not be diving into specifics with styling an interface. So feel free to design your messaging interface as you would like. I used an image from the internet and Codex to speed up my development process.
But in order to keep this simple, we’ll be using the terminal throughout this article.
4. Making a call.
With the API key stored in your environment variable, head over to the Claude Console, and in the documentation, copy the JavaScript command for making a call and paste into your route.js file in the api folder as done below. (api/route.js)

In your terminal, you should be able to make a simple call now and get a response.
5. Multi-turn conversations.
Claude needs a context history. That means we want Claude to have a history of the messages we’ve sent before and the responses we’ve received. This gives Claude precise responses. In order to do this, we want to create multi-turn conversations in the messages array, as demonstrated below.

6. System prompts.
We want to give our agent very precise instructions on what it does and how to run. We can simply do this using a system prompt. Your prompt should be precise, straightforward, clear and specific about what the agent should and should not do.
See the example below.

We then pass the system prompt into Claude so it has an idea of what it’s built for, what tools it has access to, and what’s expected of it.

7. Tools and Schemas
We have not turned our app into an agent until we provide functions that our agent can carry out on our behalf. We would be using the Gmail API for this project, so head over to the Google Cloud Console, create a project ‘email-agent’ and enable the Gmail API.
You would also need to enable OAuth. To do this, follow the instructions here

Then we get our key (under credentials in the google console) and back in our app connect our app to our gmail account. This bit gets technical so remember to slow down and work with copilot for this stage. See examples below.


Once this runs, we can provide tools to our bot, and Claude is able to make decisions of what tools to run based on what command is given to it. This is what makes an agent: the ability to know which tool to run in order to successfully and correctly carry out a request.
In order to provide these tools to Claude, we need to create them and then provide a tool schema to our bot. See steps below.
figure 7.4


A tool schema is a structure that lets your agent know what tools it has access to, what each tool is for, and how to call these tools (the functions defined in figure 7.4 above ). In order to keep this even simpler, feel free to ask Copilot or any preferred code assistant to generate your tool schemas for an email agent.
8. Email Agent.
When we send a message to our bot from the terminal, like ‘check my last 5 unread emails’, Claude is able to use the ‘search_threads’ tool defined above, and we can see all of our code tie together.

Congratulations on reaching this step! We’ve built a simple agent together. These are the basics of applied AI engineering, and along with the knowledge of prompting and tooling, to go one step further, you should learn about MCPs, RAG, and Evaluations. Again, the full code to all these snippets can be found on this github repository: willow
Feel free to check my page @techwithamal if you found this helpful! And would like more in depth explanations/tutorials from time to time.